about this guide
This resource guide explains how to add (activate) a group of students to student groups and/or remove (inactivate) a group of students from student groups using a mass assignment process.
Process
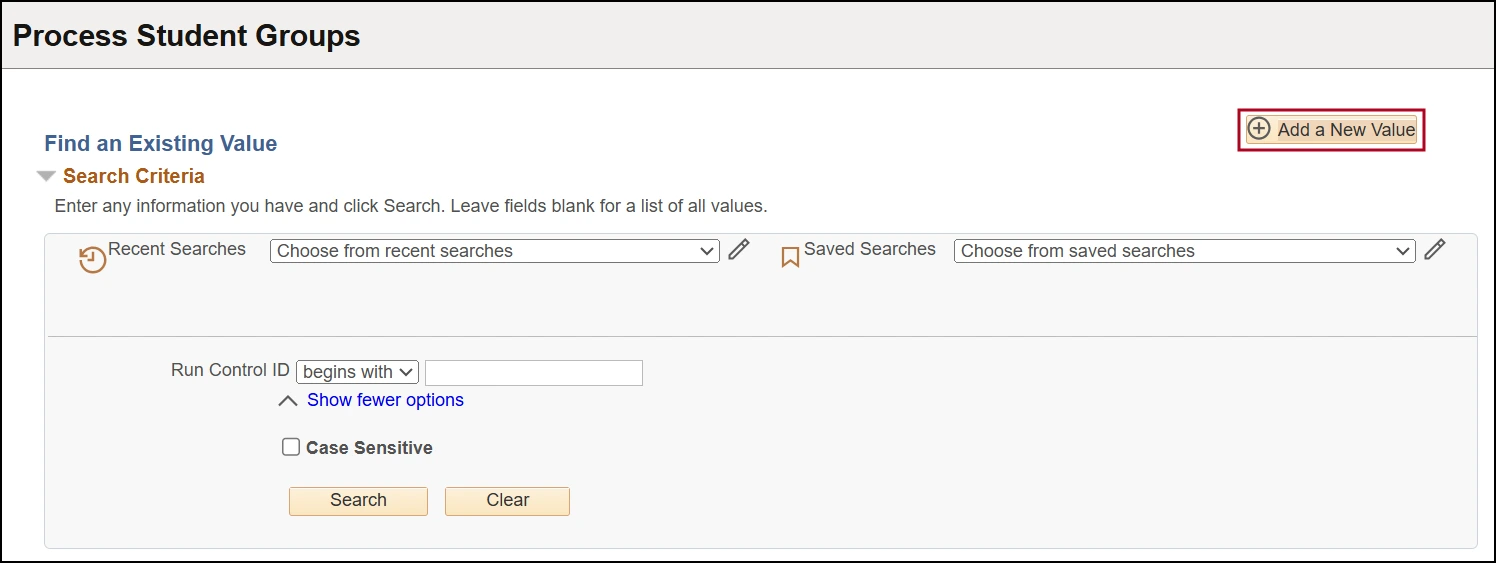
Step 1: Navigation to Process Student Groups page:
Menu > Records and Enrollment > Career and Program Information > Process Student Groups.
Unless you have an existing Run Control ID, you will need to Add a New Value (by selecting Add a New Value).
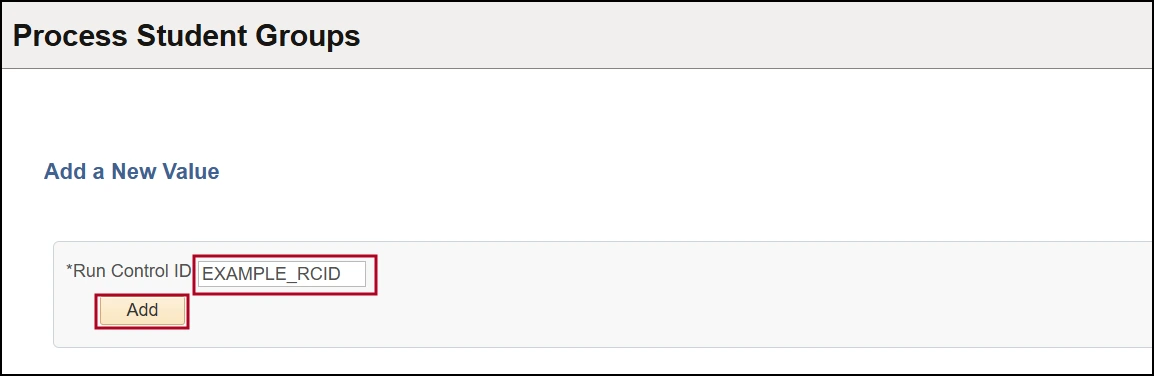
Step 2: Create Run Control ID:
The Run Control ID can be anything you would like but should include indicators for the student group you are managing. click Add
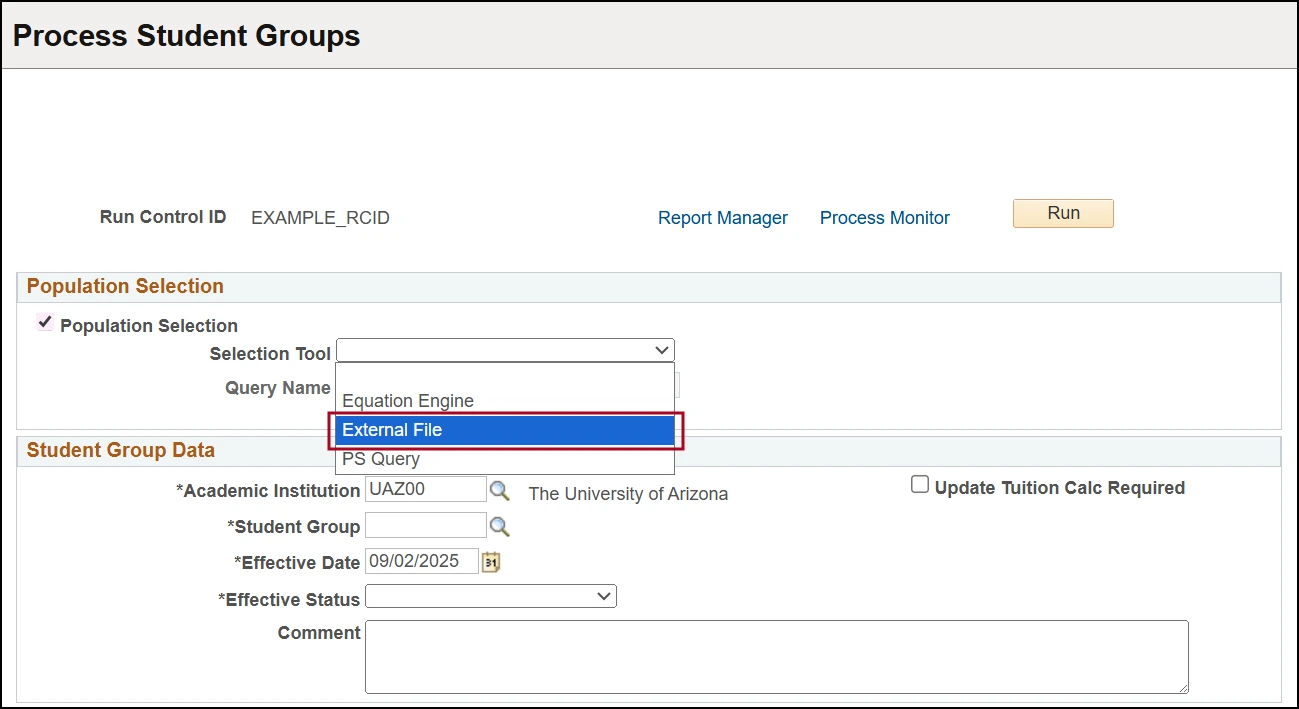
Step 4: Population Selection:
From the Selection Tool drop down menu, choose either External File (for .csv or .txt file) or PS Query when there is a query built to identify your specific population.
Step 5: If using an external file, select the Upload File button to open the File Attachment window.
Step 6: Select Choose File to select the file you are using for the assignment process, then select Upload.

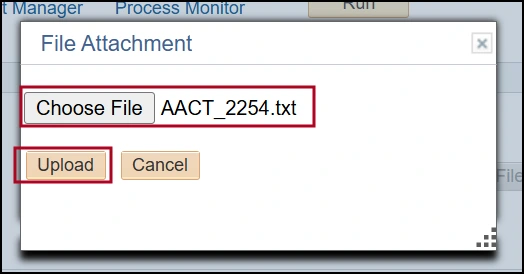
Step 7: After you upload the file, you can View File or Delete File. Before you can go any further, however, you must Create File Mapping.
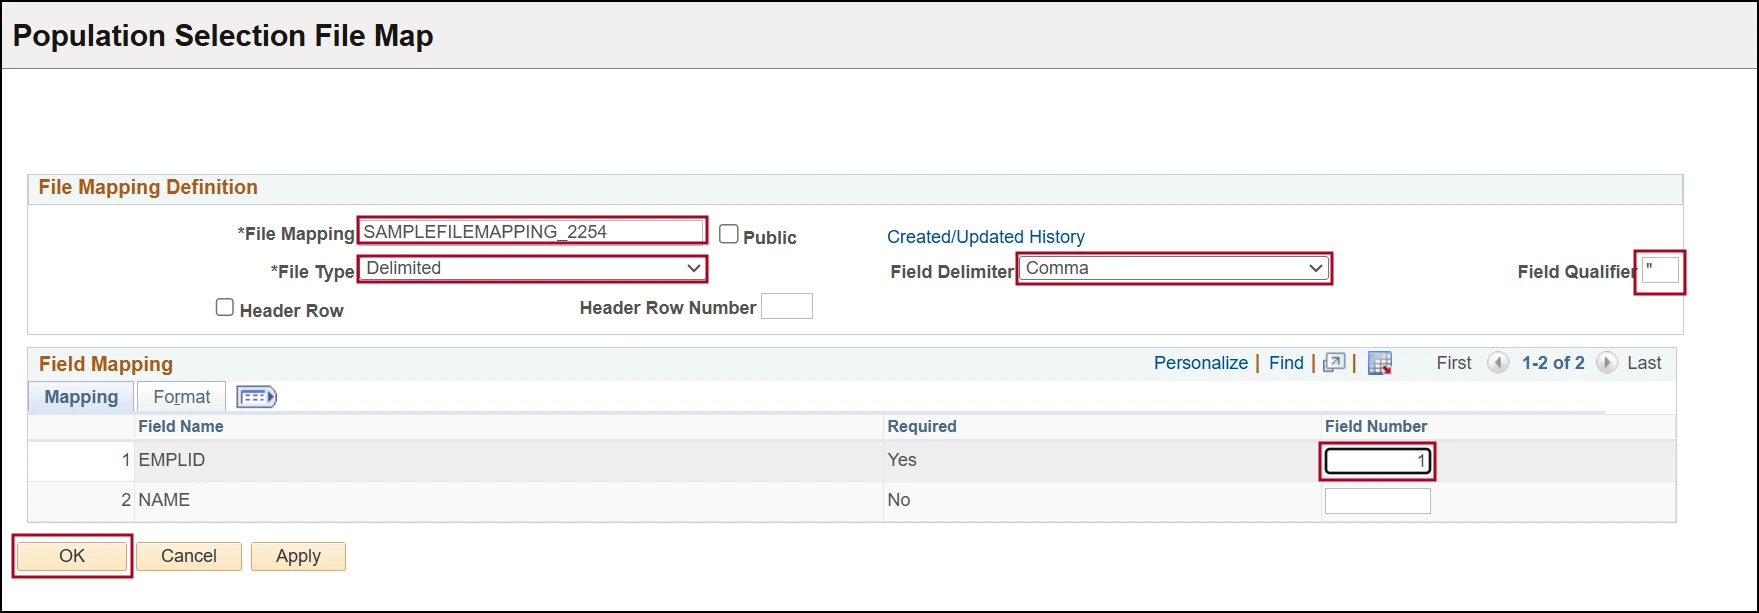
Step 8: Create File Mapping:
- In the File Mapping field, type the file name.
- If your file has multiple fields, you’ll want to verify the File Type, Field Delimiter, and Field Qualifier fields. Additionally, if your file has a header row be sure to check the Header Row checkbox and indicate the Header Row Number.
- From the Field Mapping section, be sure to indicate the Field Number for the EMPLID as this is a required field.
- Select OK

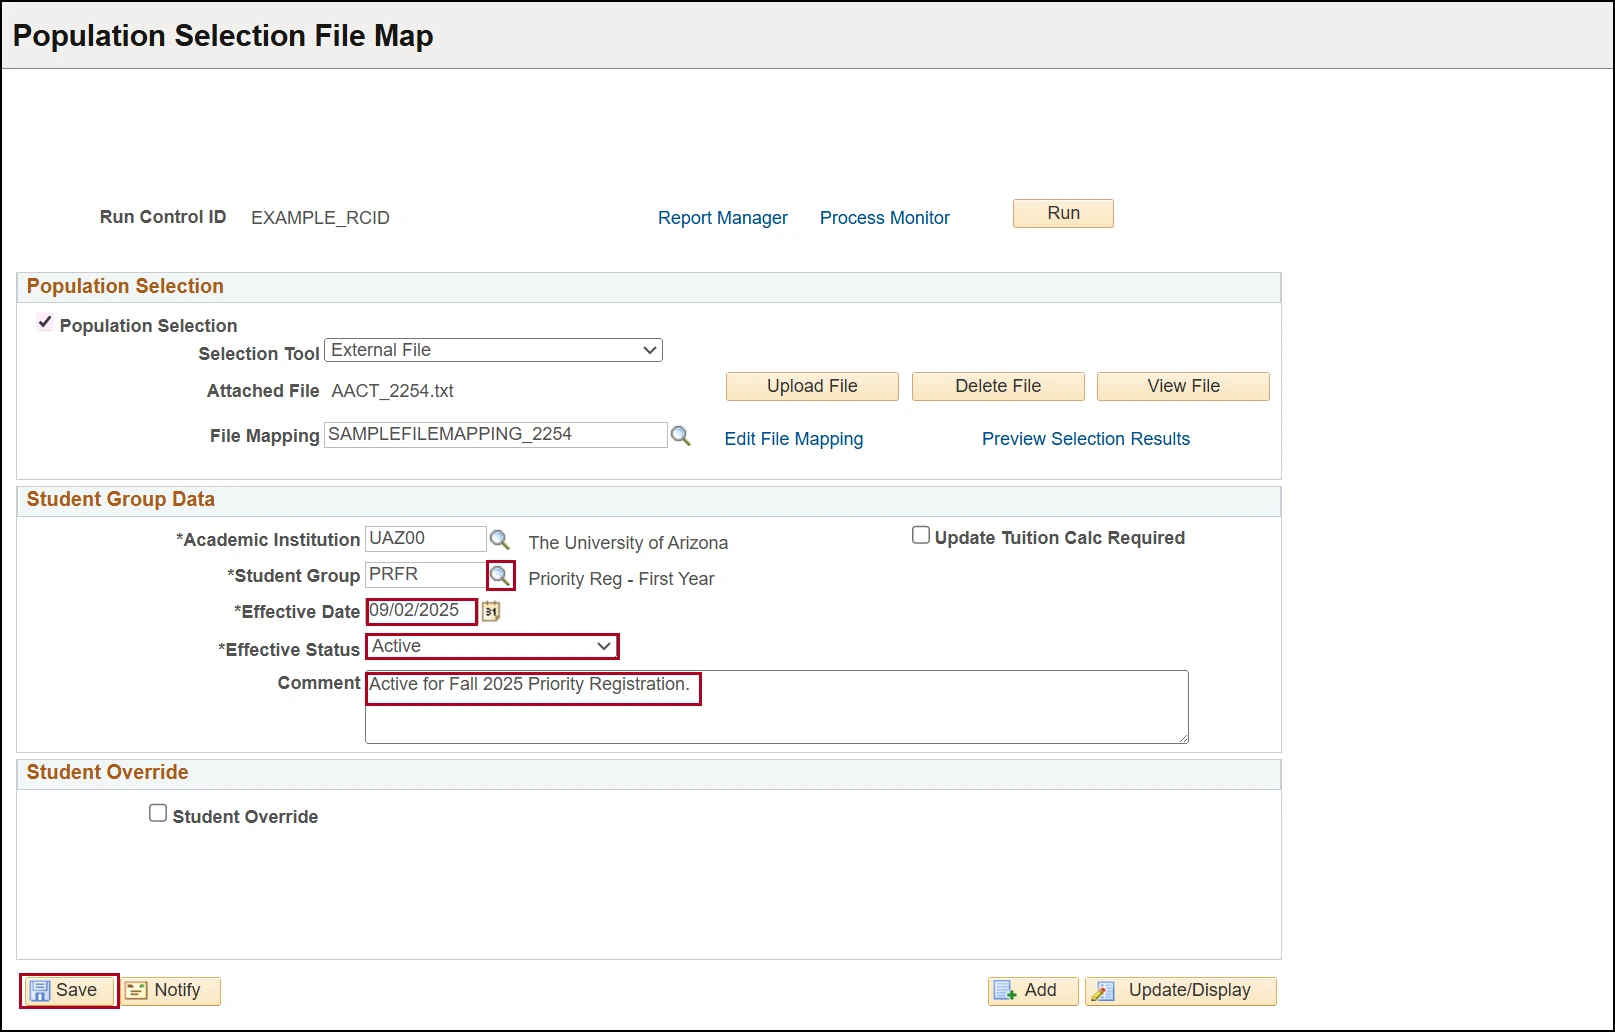
Step 9: Student Group Data:
- Select the spyglass icon to select Student Group or type code into Student Group field.
- Select Effective Date.
- Select Effective Status value (Inactive or Active) from the drop-down menu.
- Comment field should include the reason why the student group is being activated or inactivated.
- Select the Save button at the bottom of the page.
Note: In order to maintain accurate records, student groups should be inactivated instead of being deleted.
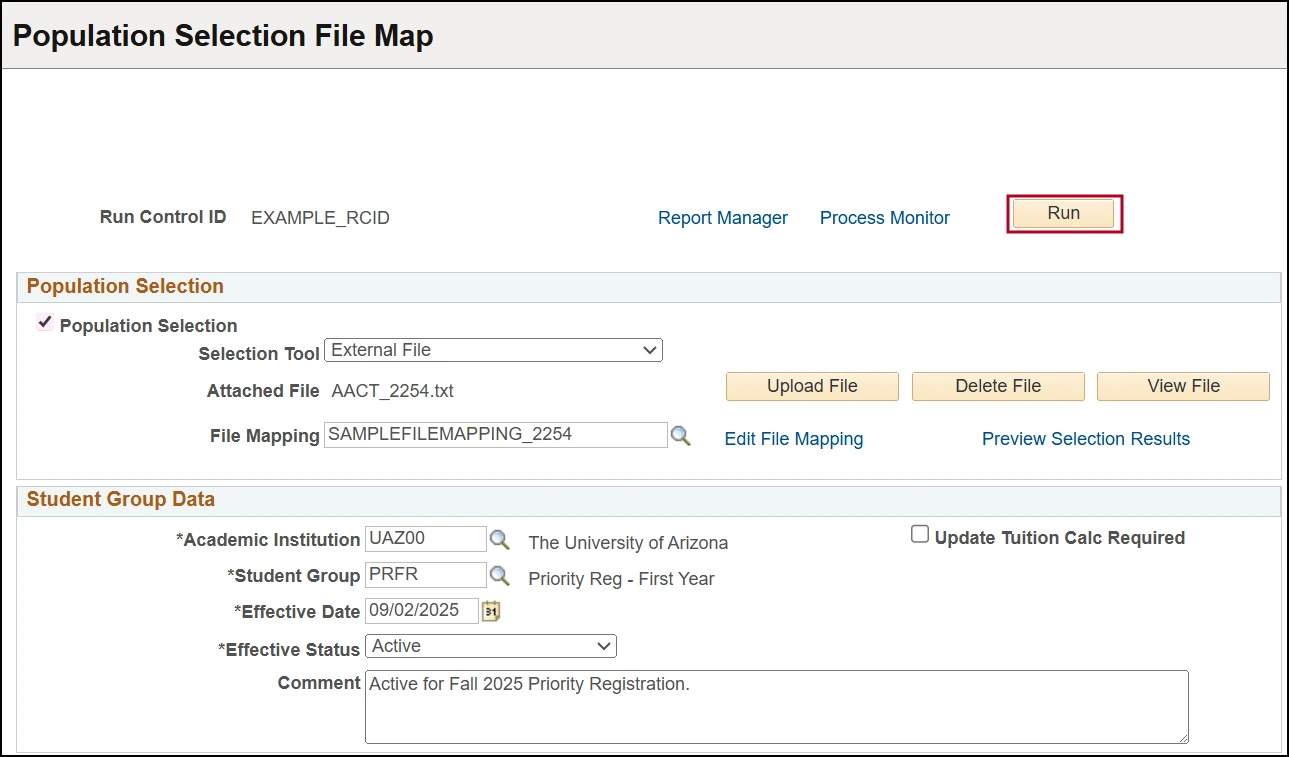
Step 10: Running the process:
Select the Run button
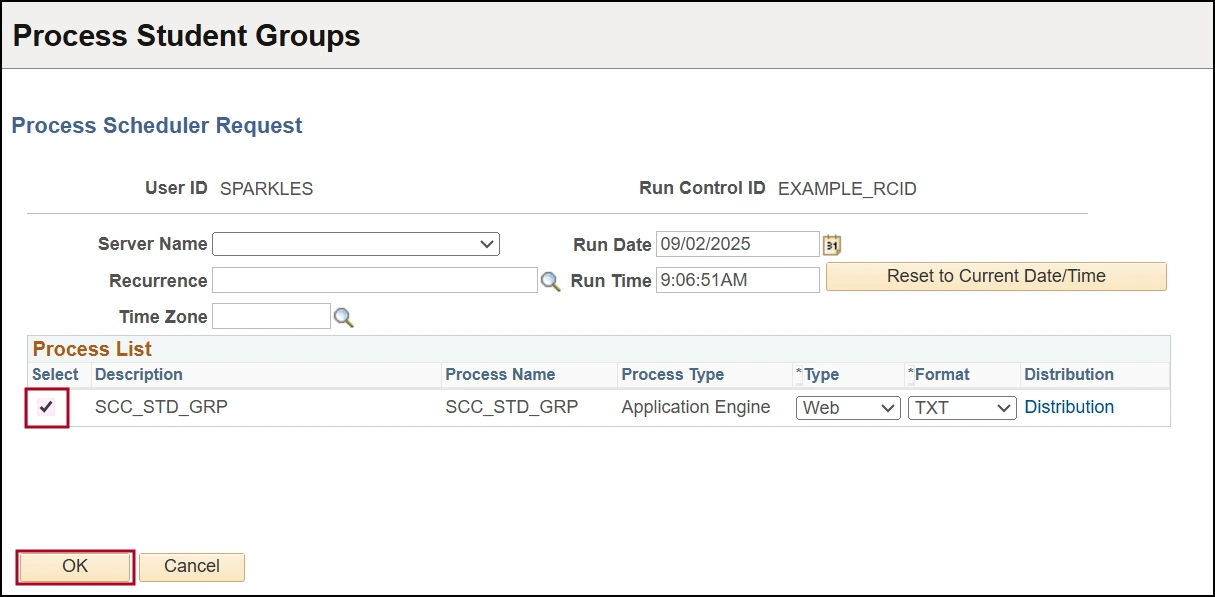
Step 11: Process Scheduler Request:
After selecting the Run button, you are taken to the Process Scheduler Request Page. Simply verify that the process (SCC_STD_GRP) is selected/checked, and then select the OK button
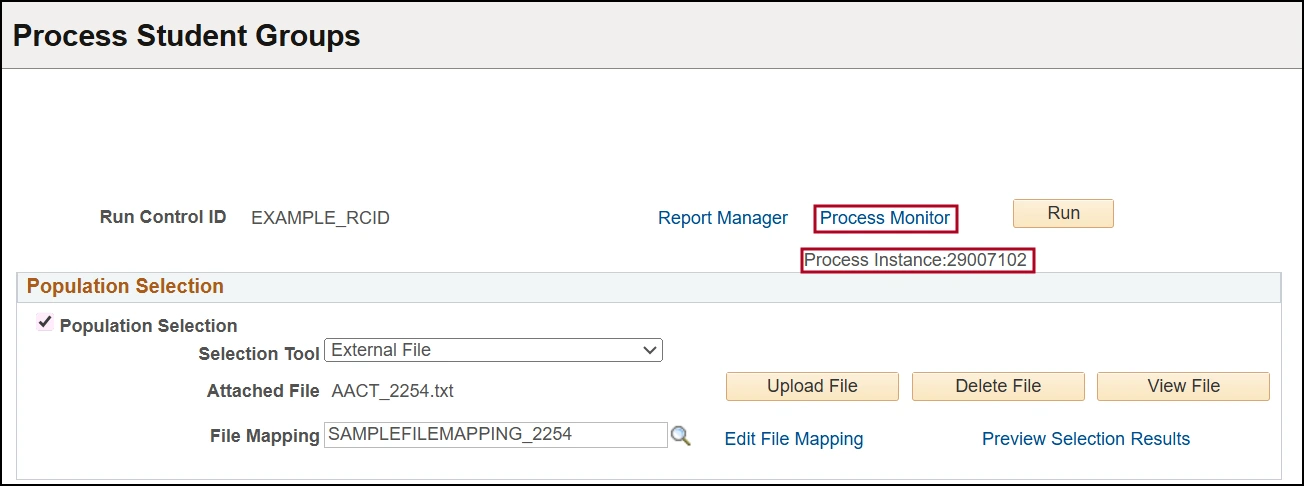
Step 12: Monitoring the Process:
You are returned to the Process Student Group Page. Notice you now have a Process Instance number. Select the Process Monitor link.
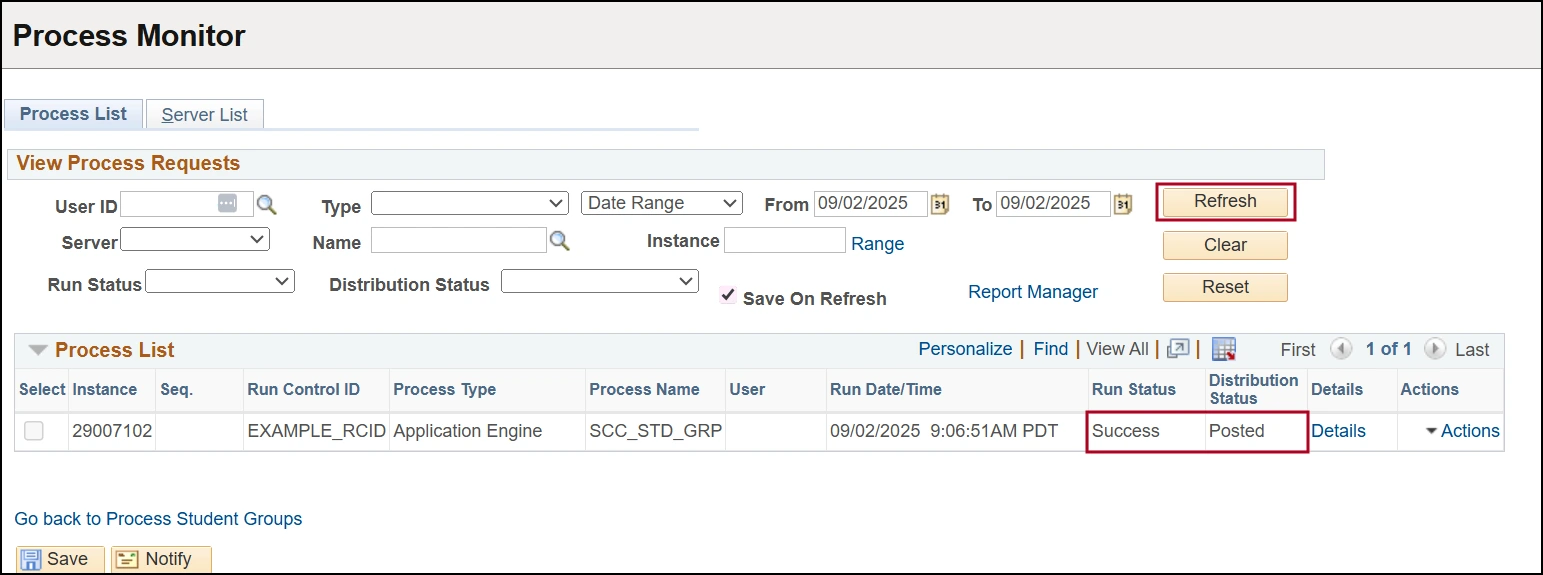
Step 13: Run Status should be Success and Distribution Status should be Posted. You may need to select the Refresh button a couple of times to see the status values change.
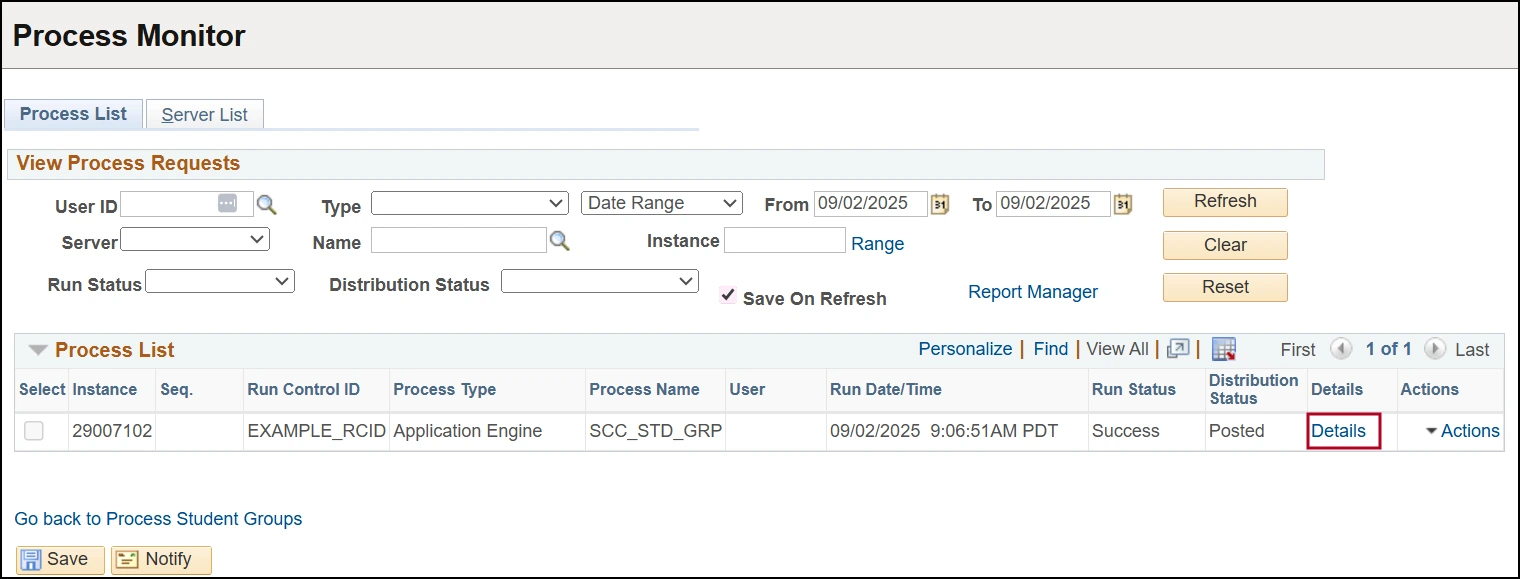
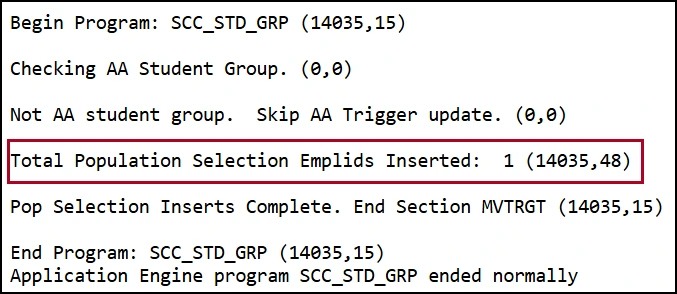
Step 14: To view the log/trace file generated after the process runs to success, select the Details link. The log/trace file will tell you how many rows were inserted/processed.
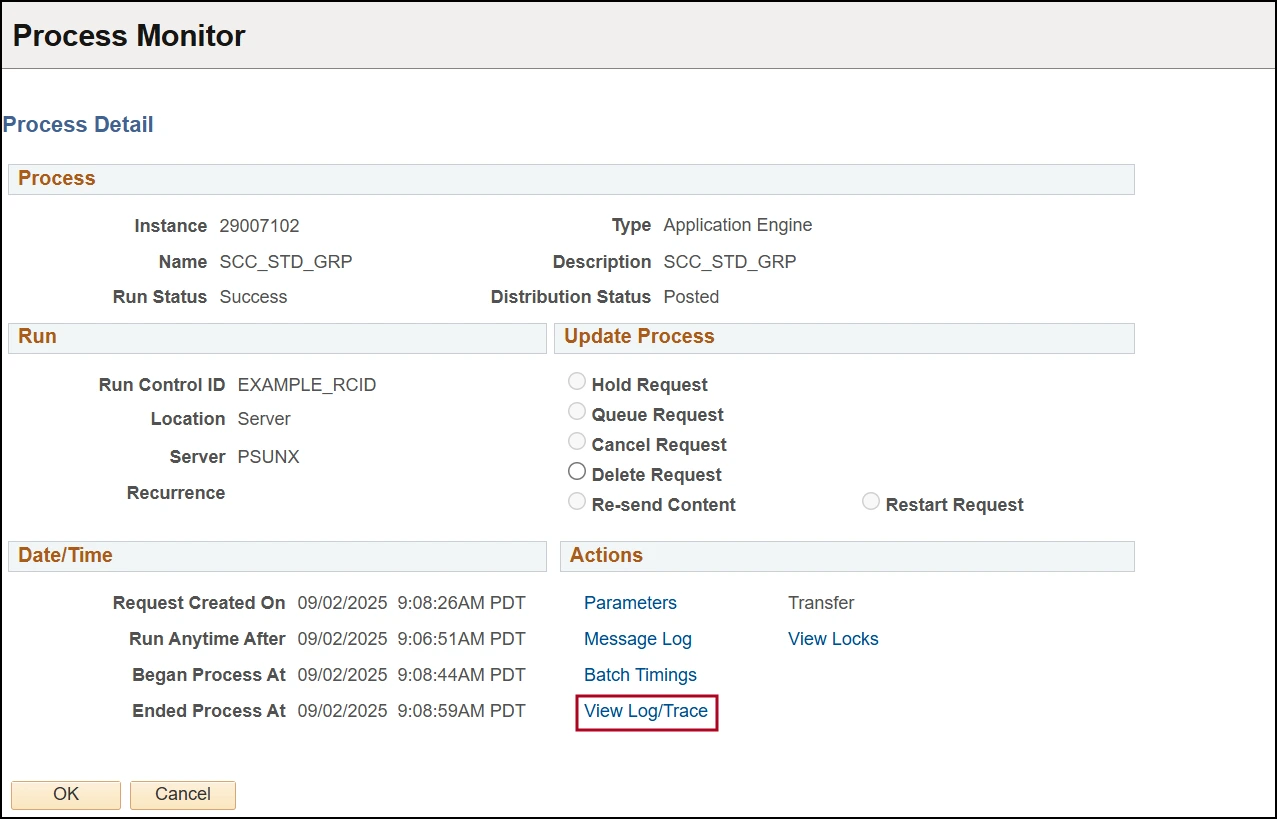
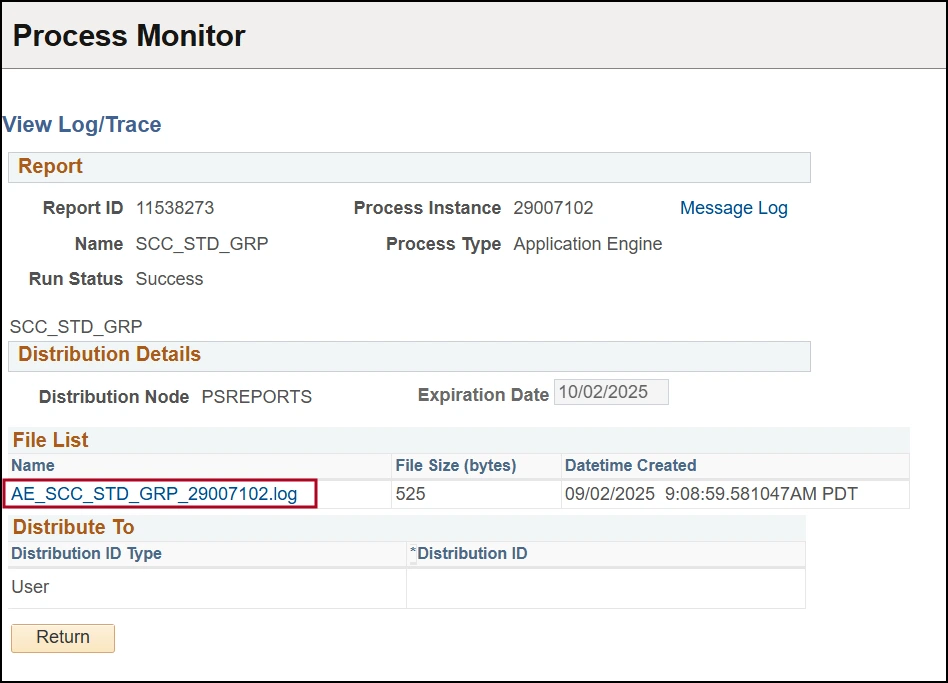
Step 15: Select the View Log/Trace link to access the file.
Note: From this page, you can also see how long it took the process to run by looking at the Began Process At and Ended Process At fields.
Step 16: Select the file name link in the File List section.
Step 17: Sample Log File showing 1 EMPLID Inserted:
Need Help? Contact Us!
For additional questions, or you would like some help please contact us: reghelp@arizona.edu
created 9/2025